Tuesday, the tenth, was our two-year anniversary in our home. Here’s the post I made on our six-month anniversary living here. Here’s the post I made at our one-year anniversary. And here’s one I made when we reached the 1.5 year mark. Today I will follow suit by listing improvements made from that day (March 11th) until now…
OWEN’S ROOM
-Nothing, really. But his room is pretty much done.
ISLA’S ROOM
-Removed Carpet
-Mudded and painted the walls
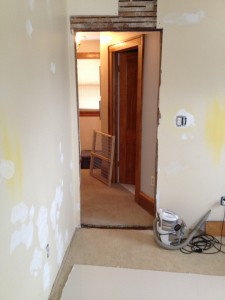 Here’s a “before” picture. The walls are mudded, as you can see, but they haven’t been painted yet. There’s also a piece of sheetrock missing above the doorway. This was because the original sheetrock split there as I opening up the doorway, so we had to fix that, as well. Notice the carpeting is still in place, too.
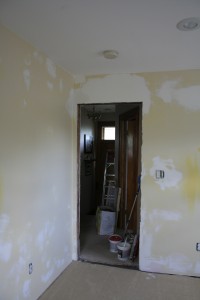 This photo was taken about a month later. Here you see the missing sheetrock above the door has been replaced.
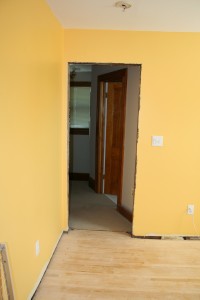 …And here you see the walls all painted. Notice, too, that the carpeting is gone as well. The hardwood floors were really scratched up and dark, we tried to refinish them ourselves…
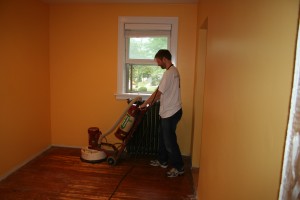 …As you can see here. Unfortunately, Menard’s equipment was so shitty that we just ended up making matters worse. So we’re calling in the experts. Stay tuned.
-Mudded and painted the ceiling
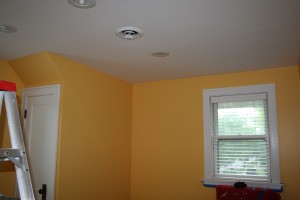 This shot is taken from the bedroom’s doorway. Notice how spiffy the ceiling looks. We plan to move that ladder out of the room before Isla moves in.
-Removed the radiator cover
-Mudded and painted the closet
-Installed covers for outlets and light switch
ADULTS’ ROOM
-Got a fancy doorknob for the door. For over a year, our bedroom door hasn’t 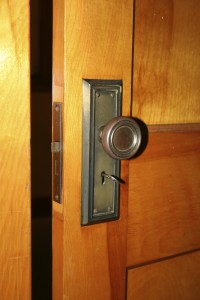 had any doorknob on it all. We finally went to Northwest Architctural Salvage and found one that matches the style of our ho
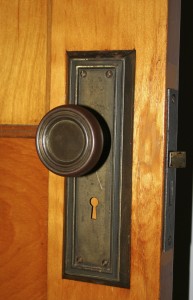 me’s architecture. It even locks with a skeleton key, which I think is pretty cool.
UPSTAIRS BATHROOM
-Installed a shelf in the cabinet. We had this cabinet that is basically just the top of the stairwell, so I vacuumed out all the cobwebs and dust in there and put in a big shelf so that we have room to store a hundred rolls of toilet paper or whatever else we want stored away.
BASEMENT COMMONS AREA
-Painted the wall next to the dryer.
-Installed shelf above dryer.
-Replaced leaky tubing to dryer’s gas line.
DOWNSTAIRS BATHROOM
-Nothing. I’m happy to say that, like Owen’s room, this room is just the way we want it.
DOWNSTAIRS SPARE ROOM
-Installed beam to jack-up ceiling. The previous owner had this amazing idea to remove the load bearing wall. And by “amazing,” I mean ridiculously stupid. So we put in a new beam. Now the kitchen floor directly above this spot isn’t caving in anymore, and we can sleep soundly knowing we won’t crash through the floor during the middle of the night. It’s a good feeling.
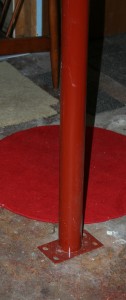 Here’s the lowest portion of the beam. I admit it’s not very pretty, but the whole room itself is kind of an eyesore. There are attractive coverings to buy for these beams. I’ll probably get one someday if we ever try to pretty up this room.
-Removed remainder of center wall. This provided me with lots of spare 2x4s!
YARD
-Moved retaining wall to wrap around gazebo.
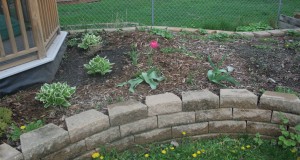 Okay, so this one is kind of hard to explain, but here you can see two retaining walls coming out from the gazebo (top left). They curved through the yard and then wrapped around the workshop. Way too much yard lost to this bit of half-assed landscaping. So I altered the bricks to look like this…
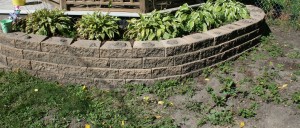 …So now the bricks just wrap around the gazebo. We raised the wall up a level, too (so now it’s four bricks high instead of three). This helped to hide the ugly underside of the gazebo’s decking. It also gave me a place to pile in some of my extra soil. We put our extra hastas inside this planter, too.
-Installed rain barrel and moved gutters to align with barrel. I already bragged about this accomplishment IN THIS BLOG POST, so go there to find out more.
-Spray painted the mailslot. Yeah, I didn’t like the rusted-gold look. Now it’s spiffy and clean and white.
GARAGE
-Installed shelf near rafters
-Moved existing shelving and workbench to far corner. Yeah, I don’t know why I didn’t think of this right away, but Jennifer had the brilliant idea that we should put this stuff as far into the back of the garage as possible, so that it doesn’t interfere with our doors when we get in and out of the cars. Good idea.
-Installed hooks to hang bicycles.
-Installed gutter over workshop door. This four-foot long gutter is supposed to help prevent rain from washing off the roof and right onto the threshold of the workshop and, more importantly, prevent icicles from forming there in the winter, where they might fall onto my renter. It’s already worked for the former, time will tell if it helps with the latter.
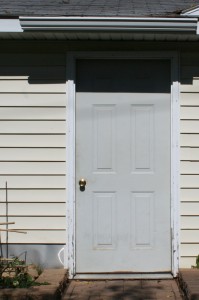 Yep, here’s proof. There’s now a gutter above this door.
-Insulated and closed off back side of workshop. There was a missing piece on the outside of the back of the workshop. I insulated it and then installed a wood covering; this has helped prevent rainwater from washing into the workshop.
So, as you can see, a lot more went on outside the house this time, probably because these past six months have included the warmer spring and summer months. Now we’ll turn our attention back to the inside as autumn and winter descend upon us. I, for one, hope that the next update (to take place in mid-March of 2014) includes the wondrous proclamation that my daughter’s room is completed. Let’s hope!

The previous owner didn’t remove a load bearing wall entirely. He removed most of the wall and left a column on the main floor to support the weight. So instead of the weight being dispersed it is now all in one spot. At the same time, he cut the diagonal boards out of the floor to retrofit a dishwasher in, and for some reason notched wood out of the corresponding basement supporting beam. So all those things added up to sagging floor, which putting a column in the basement directly under the one on the main floor, and under the notched beam in the basement to jack it back up, helped to support all the weight again and straighten the floor. If he had taken out a whole load bearing wall we would have a lot more serious problems.
Isla’s room looks really good! I like the orange paint and your ceiling work does look nice.
I do think that you should reconsider removing that ladder from the bedroom. Your daughter would really enjoy playing on it. I don’t see any harm in just leaving the ladder there where it is.
I never expected I’d find myself jealous of someone’s bedroom doorknob, but here we are.
Jennifer – Thanks for the clarification.
Cory – Thanks! Yes, the room is coming along slowly, but we’re getting there. The wall paint is actually a deep yellow, but I can see how it looks orange in the photos.
David – Funny that you’re jealous without even seeing the knob! I updated this blog post with photos of the knob, including the skeleton key. Is it the knob’s antique style you like, or just the fact that our door locks?