Saturday, 10 March 2012
Today marks six months since we moved into our house. I thought I’d take this half-year anniversary to list the improvements (or changes, if you prefer) we’ve made to the place since purchasing it…
ALL OVER THE HOUSE
-Cleaned the blinds (except Isla’s room and our room)
-Removed spare slats from blinds (except bathroom, Isla’s room and our room)
-Removed curtains
-Filled radiators (most were low on water)
-Cleaned ceiling fans
-Cleaned light fixtures
OWEN’S ROOM
-Removed an enormous built-in shelf
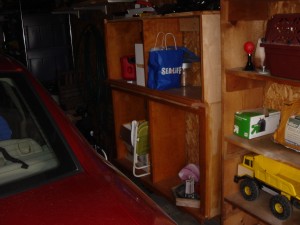 Okay, so I hope it’s obvious this picture was taken in the garage, not Owen’s room. But here’s the shelf we took out of his room. Or, rather, this is two-thirds of it. It was hanging on the wall. Quite imposing for a kid’s room.
-Painted all walls, including those in the closet
-Painted ceiling
-Painted ceiling fan
-Replaced ceiling fan’s light fixture with one that better matched style of room
-Removed radiator cover (all the radiators in the house have custom-made wood covers on them; we got rid of the one in Owen’s room since the radiator itself fits the robot/science theme)
-Put in molding below window
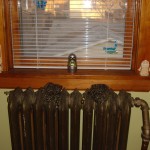 This illustrates what I’m talking about. Notice the piece of wood below the window sill. It wasn’t there when we moved in. We found the piece in the garage and nailed it up. I know it sounds silly that the previous owner would have removed the molding around one-quarter of the window, but keep in mind that there was a radiator cover, so there wasn’t room for the molding.
ISLA’S ROOM
-Nothing. Absolutely nothing.
ADULTS’ ROOM
-Flipped the fan blades to expose the slightly less hideous side.
UPSTAIRS BATHROOM
-Replaced toilet seat
-Replaced toilets seal and phlange
-Installed lock
-Installed door-stopper (more precisely, we installed a better door-stopper – the prior owner simply used the cabinet molding as a door-stopper, as a huge gouge attests)
-Fixed medicine cabinet so that door didn’t almost fall off every time we opened it
-Put caps on toilet bolts
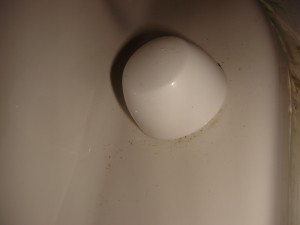 Here’s the seedy underside of our household: used to be, there were just dusty, dingy bolts sticking up here. But I sawed ’em down to size and capped ’em.
UPPER STAIRWELL
Fixed handrail so that it wasn’t *almost* falling off.
LIVING ROOM
-Washed fireplace bricks
-Straightened mantle (you know, so that clocks and pictures wouldn’t pitch forward if we set them on the mantle)
-Swapped out one electrical outlet (details found here)
-Installed weather stripping under front door
-Replaced torn, filthy, chewed up carpet pad with spiffy, spongy pad (thanks, friend)
-Got the fireplace to work (thanks, brother-in-law)
OFFICE / TOY ROOM
-Removed ceiling molding (there were dark, heavy pieces of wood running along the edge of the ceiling; we ripped them out)
-Painted all walls
-Replaced molding above windows
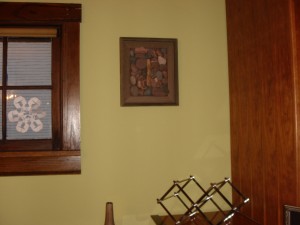
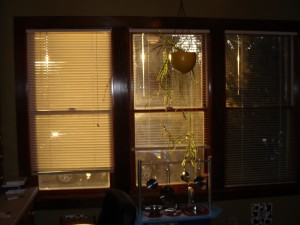 Similar to the molding we replaced around Owen’s bedroom window, the top piece of molding wasn’t there when we moved in. The prior owner likely removed it to install his $1.99 curtain rod. We couldn’t find the original molding but we found two pieces that, when butted up to each other, work splendidly.
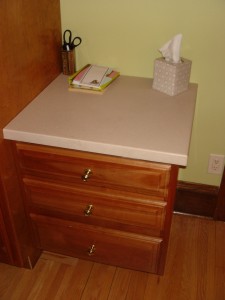
-Put access holes in desk (not sure if that makes sense…so just look at the picture below to see one of two of these holes)
DINING ROOM
-Painted all walls
-Removed two large cabinets
There used to be a large cabinet located to the right of the window here. It was as wide as the wall and taller than the window. I took it out (and its companion to the left of the window) and sold them for cold cash.
-Screwed desk to wall
Here’s the desk I’m talking about. I know it seems odd to list securing this to the wall as a home improvement, but my son inadvertently discovered it was quite easy to tip this thing over. I immediately set about remedying the situation, and was surprised to find there was already a hole in the back of the desk and in the wall, indicating it had been secured once before. Not sure what changed.
KITCHEN
-Painted all walls
-Installed door-stopper on back door
-Replaced busted light-switch cover with non-busted light-switch cover
-Got built-in radio to work (and straightened it)
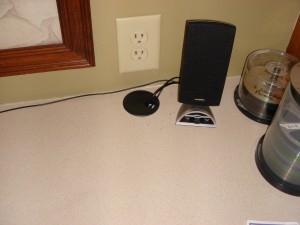
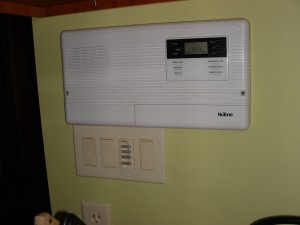 Here’s the headquarters of our built-in stereo system. It used to be crooked. And it didn’t work properly. And that light switch plate directly below it was cracked in two places. All better now!
-Got in-fridge water dispenser to work a lot better
-Painted door’s window frame
-Removed wood from fridge front
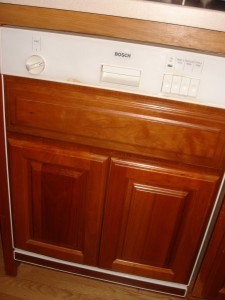 I know that my comment about wood on the fridge might be kind of confusing, so here’s a picture of our dishwasher. Notice it has a wood front. Kind of weird, but not exactly butt ugly like, say, our chandelier. Our fridge used to have a front like this, but I removed all four panels. Now it looks like this:
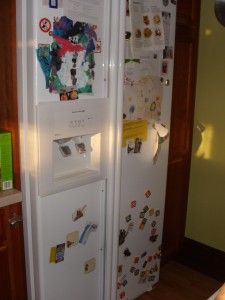 See? Now this is how a fridge should look – with magnets and kid creations scattered all over.
MUD ROOM
-Painted all walls
-Painted door stop
-Painted door
-Removed large shelf
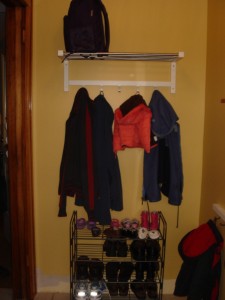 There used to be a cabinet here stretching from the floor to almost the ceiling and nearly as wide as the wall. I traded it for cash.
LOWER STAIR WELL
-Fixed railing
BASEMENT COMMONS AREA
-Removed fridge
-Swapped fluorescent light with non-garish illumination option
-Put light switch in laundry area on the wall instead of on the ceiling
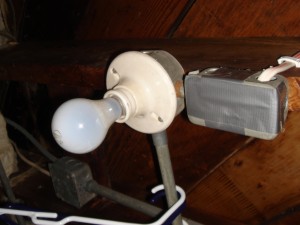 I know this picture is kind of disorienting, but here’s the light above our washer and dryer. The gray box to the right is where the light switch used to be. Not sure why the prior owner put it there, but maybe there was a shortage on electrical wiring and he couldn’t find any at any of the twenty hardware stores within the city limits.
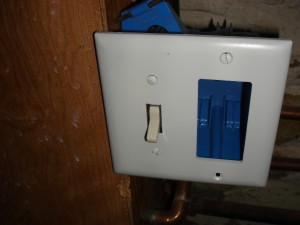 Here’s the new light switch, conveniently located on the wall about four feet from the ground. The open spot is for the outlet, which is also located on the ceiling as of this writing.
DOWNSTAIRS BATHROOM
-Removed three very ugly towel racks
-Replaced toilet seat
-Fixed toilet so it no longer wobbles
-Hooked up ceiling fan so it now vents to the outside instead of to the rest of the house
-Removed the ugly, obtrusive, mold-encrusted soap/shampoo dispenser from the shower stall
-Installed new tap
-Removed hideous toilet paper holder with sleek IKEA style worthy of the name “toilet paper dispenser”
-Installed two towel/clothes hooks
-Removed a light fixture (hey, the bathroom had four light fixtures; how many do I need in a five by five room?)
-Removed obnoxious cabinet from above the toilet
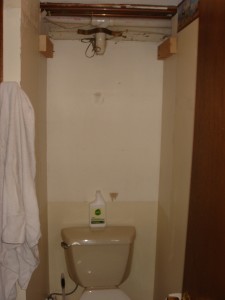 I think it really says something about the cabinet I removed when I say: This is an improvement! Honestly. I can now sit on the seat without having to lean forward, and I can stand without feat of smacking my head on the cabinet. I’ve since installed the guts of the cabinet (i.e., the shelving) in our workshop.
-Replaced all cabinet handles with non-rusted models
SPARE ROOM
-Removed fluorescent light, replaced with incandescent model, got some sucker to take the old light fixture so I didn’t have to pay to recycle it
-Removed peg board from wall (and sold it for five big ones)
-Had the hot water heater serviced
-Knocked down wall…mostly (like our previous house, we moved into a place where the prior owner decided to put up a wall that intersects a window; we dislike that)
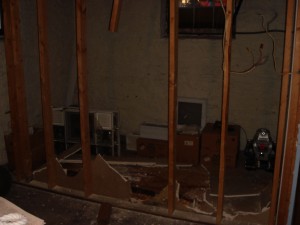 Clearly, this is a work in progress. But this moldy wall, intersecting a window, is on its way out.
YARD
-Fixed sprinkler system so that it works
-Removed water-logged, moldy thermometer from side of garage (it was especially unnecessary since there is a much better thermometer only four feet away from this one)
-Pulled lots of weeds, including ivy that grew up the side of the house and blocked sunlight from the windows
-Removed two stepping stones from yard
GARAGE / WORKSHOP
-Removed inoperative garage door opener (and got someone to take it!)
-Installed new garage door opener
-Insulated workshop walls and ceiling (the walls were about half done already)
-Nailed up wood to walls and ceiling
-Removed padlock fixture on door
-Hired professional electrician to “do” the electrical correctly in the workshop and garage
-Installed two shelving units (see above for picture of one of them)
Okay, that’s pretty much it. I mean, we’ve done a lot of other stuff, but either it was so minimal (like caulking a gap below a window) or was just decorative stuff (like hanging pictures), so I didn’t list it here.
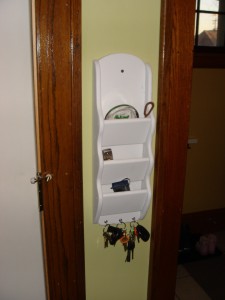
Oh – one other thing. Not sure if this qualifies as a home improvement, but there was this bill holder/key holder shelf near our side door that was left here when we moved in. We both talked about getting rid of it but, in the interim, we began using it. Soon, it seemed like a valuable thing to have. Unfortunately, it was installed off-center and it was pretty ugly. Today, I finished painting the wood white and the hooks silver. I hung it up again – this time, perfectly centered. Take a look:

Good job on all the work you have done on the house.
Your fridge looks much better without the wood. Didn’t you say that the former owner worked at a wood shop? I’m surprised he didn’t add wood paneling to all the walls in the house too. Maybe that was next on his list before he decided to sell.
Nice work James!
Pingback: Workshop walls | Yourmalefriend
Thanks, Cory and Welch!
Cory – the prior owner was a wood shop teacher. So, yes, given enough time, he probably would have installed paneling everywhere. I bet he drove one of those cars that has faux-wood paneling.