Sunday marked a year and a half since we moved into our house. Here’s the post I made on our six-month anniversary living here. And here’s the post I made at our one-year anniversary. Today I will follow suit by listing improvements made from that day (September 10th) until yesterday…
OWEN’S ROOM
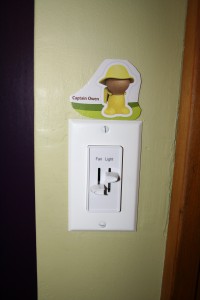
-Replaced the light/fan switch with a workable unit. The old model did not allow for adjusting the fan speed and the dimmer switch no longer worked. Now it does.
-Swapped out the windows’ trim screws with gold screws. Read this post to learn more about this.
ISLA’S ROOM
-Removed clothing bar and cedar wood sheets from the closet
-Removed the remaining 1/3 of the built-in closets
-Installed a new outlet. When we removed the closet shelving, we discovered a box with wires. I figured they would probably work with an outlet. I was right.
-Painted the window trim white
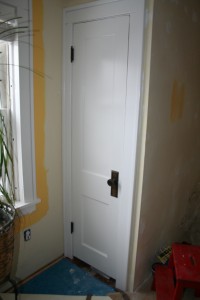
-Painted the closet door white. Here’s a before-and-after pairing:
-Replaced the missing finishing screws on the window trim. Swapping out all of the trim screws in Owen’s room with gold screws gave me several extra screws to fill in all the places in the house where they were missing, including the two missing in Isla’s room.
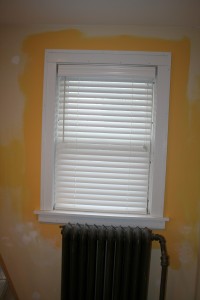
-Installed new blinds
Here’s the new blind, and there’s a similar one on the other window in Isla’s room. The weird painting job you see here is because we painted around the window before re-installing the molding, but haven’t painted the rest of the walls yet.
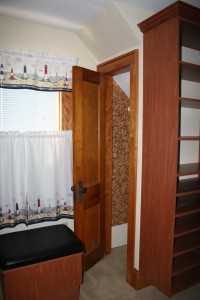
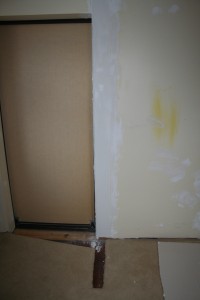
-Removed a small wall. Look at the picture below.
See the spot where there’s no carpet, jutting out from the main wall at 90 degrees? That’s where a wall used to be. We took it out.
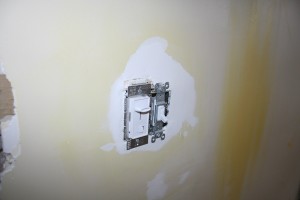
-Moved the light switch from the small wall to the east wall, and swapped it with a dimmer switch instead of a plain on/off switch. The light switch used to be on the small wall, but taking out that wall meant the switch was just dangling from the ceiling. So I moved it to where her bedroom door will be.
I’m rather pleased with how well I did on this; once we paint the wall and I put on the plate, you’ll never know that there was once a huge hole here where I rewired the switches.
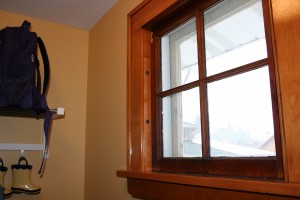
-Replaced window sill on east window with one that was a better length and thickness. Painted it white. (See the photo of the window, above, to see the sill.)
-Busted out the sheetrock leading into the hallway, where a proper door will go. I just did this yesterday, so this is the latest development on the list.
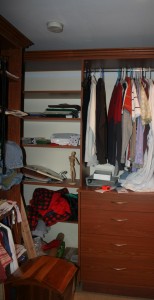
Here’s what the northeast corner of Isla’s room looked like a year ago: wall-to-wall shelves. Behind those shelves is the hallway, but Isla’s room was blocked off from direct access to the hallway (her room could only be entered from the master bedroom).
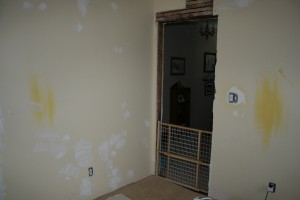
…And here it is now. The shelves are gone and her room can now be entered directly from the hallway. I know this picture just looks like a total mess right now, but we’re midway through the project of refinishing her room, so check back in six months to see a marked improvement.
UPSTAIRS BATHROOM
-Replaced light switches. The old ones were crackling (never a good sound with electricity).
UPPER STAIRWELL
-Nothing. Though my wife hung more photos.
DINING ROOM
-Replaced chandelier with way better chandelier. Subsequently sold old chandelier for more money than the I paid for the new one. That’s how I like to do things. Read more about the chandelier swap here.
KITCHEN
-Replaced missing finishing screws in window trim with more of those spares from Owen’s room.
MUD ROOM
-Replaced missing finishing screws in window trim with more of those spares from Owen’s room.
You can barely see them here, but the little dark spots just to the left of the window are finishing screws. This window used to have no finishing screws, and the trim around the window was barely in there. It let in a draft, too. All better now.
BASEMENT COMMONS AREA
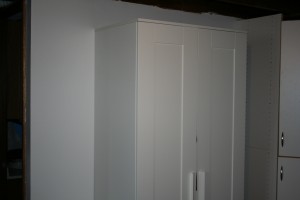
-Painted west wall. Installed a closet in front of that wall.
The wall used to be unpainted, now it’s a basement-brightening white. The closet is from IKEA and, I gotta say, I love having a closet right next to the bathroom.
-Removed majority of sheetrock from basement ceiling. It was moldy.
DOWNSTAIRS BATHROOM
-Painted walls and ceiling.
Let’s look at the progress on the wall where the toilet is…
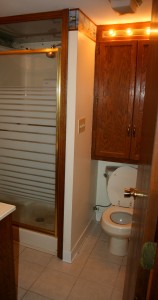
Here’s what it looked like looking straight into the bathroom from the door. This photo was taken before we moved in. Notice the cabinet above the toilet, which prevented toilet-users from sitting upright. Also, notice the lights above the cabinet: garrish!
Here’s a similar angle taken about six months after we moved in. The cabinet is gone, and so are the lights, revealing a different color wall behind, as well as pipes and wiring.
This picture was taken around our one-year anniversary at our home. Here you can see I’ve built a wall to cover the electrical and plumbing.
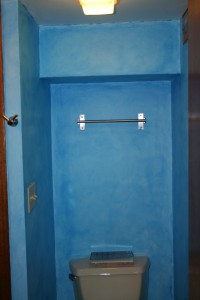
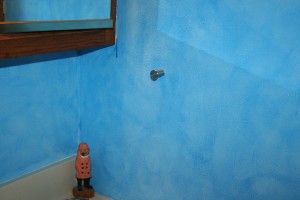
And here’s a picture I took this weekend. Now it’s painted. I like the blue wash, very cool and clean – which I think are good options for a basement bathroom. You’ll see I’ve also installed a simple metal shelf, which is more than sufficient for anything I ever need to store or hang in this bathroom.
-Installed shelf and towel hook. See above for the shelf, but the hook is shown right here, just to the right of the sink:
YARD
-Removed sprinkler system.
GARAGE
-Nothing. This isn’t exactly the time of the year when I like to be out in the garage.

![DStairs-Bathroom-Shelf-e1331522791427-225x3001[1]](http://zimmerscope.com/Verbisaurus/wp-content/uploads/2013/03/DStairs-Bathroom-Shelf-e1331522791427-225x30011.jpg)
![Bathroom[1]](http://zimmerscope.com/Verbisaurus/wp-content/uploads/2013/03/Bathroom1-233x300.jpg)
With that cabinet over the toilet, how could you open the lid to the tank? Didn’t the former owner think about getting in there?
Not sure if you can tell from the photo, but there was a 5 to 6 in gap between the tank lid and the cabinet, so it was *possible* to remove the lid. What was difficult was getting access to the tank once the lid was removed.
Yeah, the former owner did a lot of stupid things. I can certainly understand the desire for cabinets in a bathroom (to store TP or towels), but it didn’t need to be that big or extend that far down.
Nice work James. You are a jack of all trades, master of… writing?