
As of this week, I’ve lived in my home for 7½ years. As I’ve done semi-annually since moving in, I will hereby provide an update on improvements made to my home in the past six months.
By the way, if you’re interested, here’s the blog post detailing what Jennifer and I did during the six months prior to these most recent six months.
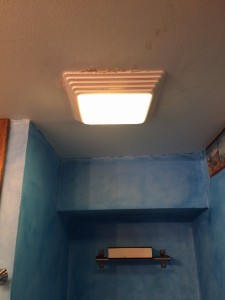
UPSTAIRS BATHROOM
-Replaced sink and vanity
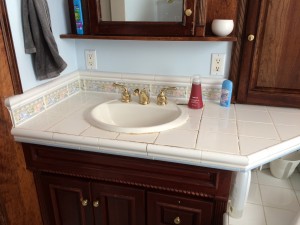
Here’s the vanity as it’s looked for the past 7 years.
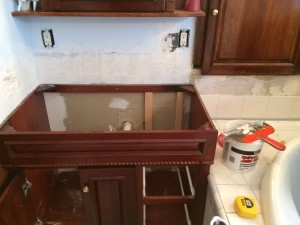
Here it is with sink and back splash removed.
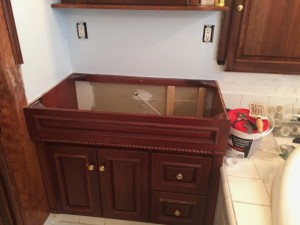
Here, you can see we’ve cleaned up and painted the wall.
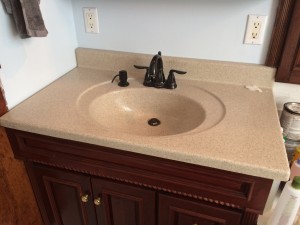 And here’s the finished vanity. New tap, too.
-Removed shelf and tiles above tub. Notice the area to the right of the vanity; we tore out the adjacent shelf that was there, which also meant busting out the tiles. I purchased new tiles for this spot, but have not installed them yet. You’ll see that in the next home improvement update (I hope).
DOWNSTAIRS BATHROOM
-Replaced bathroom fan
See below for more details on this.
-Replaced cartridge in shower knob.
I’m pretty proud of myself for this one. As long as I’ve lived here, the shower has leaked – unless I turn the knob all the way toward the cold water, which I was careful to do after each shower. But several months ago, it began leaking all the time. So, I took apart the spigot and knob, and purchased a new cartridge for it. I managed to get it completely backwards the first time – turning the knob toward HOT yielded cold water – but then I quickly fixed it.
BASEMENT
-Removed rest of sheetrock, a small wall near the circuit breaker box, and wood panels from the ceiling.
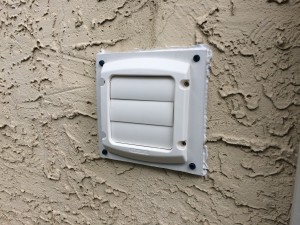
-Rerouted exhaust vents.
Okay, this is gonna take some explaining.
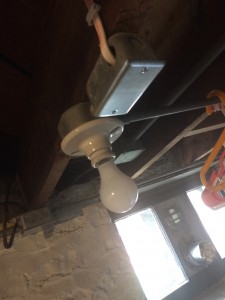
There are two exhaust vents in the basement, one is from the bathroom fan, and the other is from the dryer. Both had ductwork that led them along the ceiling, over the laundry area, and then out a window, as you can see here:
As you can see here, it was really ugly. The two vents went right out through a window; a thin piece of tin around the ductwork sort of kept out the weather. But it wasn’t sealed right – I had to use duct tape to hold it to the window frame (that’s the blue strip you see), and it blocked out the light. And did I mention it was ugly? Removing the vents is easy enough, but the issue is: where will they exhaust instead? This leads me to…
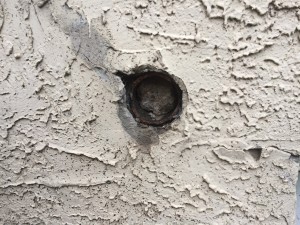
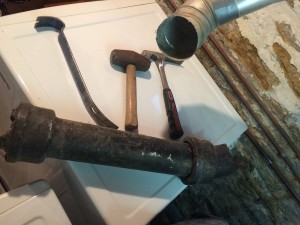
-Removed iron pipes embedded in walls
In between the ceiling beams in the basement, there was a 2-foot long iron pipe embedded in the wall, just above the washing machine. There was also a 5-foot long pipe in the spare room of the basement, also embedded in the wall. Here’s what one of them looked like:
Really ugly, right? Well, I removed both of them. This required smashing them with a mallet from both sides, until they came loose.
Here’s the long one:
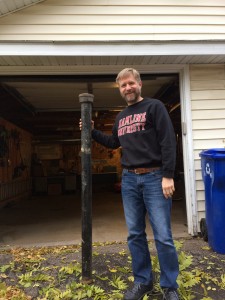
Look at it! It’s nearly as tall as me! I took it to a metal recycler and got $4 for it.
Here’s the shorter one:
And here’s what the hole in my house looked like after removing that shorter one:

So, then I rerouted the bathroom fan. This actually necessitated a new fan – which I’m grateful for, as the last one did little more than make noise. My new one is much better quality.
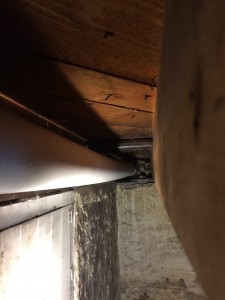
Here’s the vent leading between the beams to the hole I created in the side of my house:
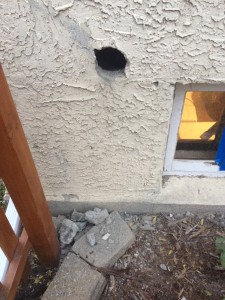
And here’s what it looks like outside:
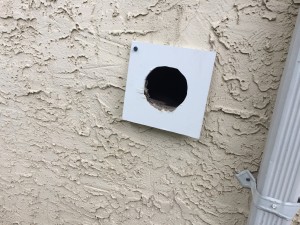
 Here, you can see I’ve prepared the area by installing a classy white frame around the hole; fully caulked.
And here’s the completed project.
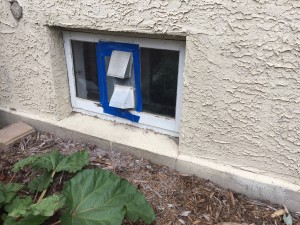
So then the basement window looked like this for about a month:
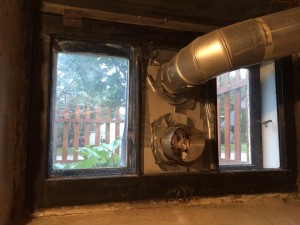 Here, you can see I no longer needed the lower duct, since I had rerouted it to the other side of the basement, but I was still using the upper duct, which served the dryer.
Eventually, I rerouted that one, too.
Here’s the view from outside that window:
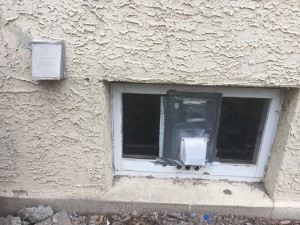 In the top left of this image, you can see where the dryer now vents. That window is no longer blocked with tape and tin anymore, either, as I took one day during Xmas break to replace it with an actual window pane. Sorry, I don’t have a photo!
-Replaced broken window pane
You can’t tell from looking at the photo above, but the inner pane on the right side of the window was cracked. I removed it and put in a new one.
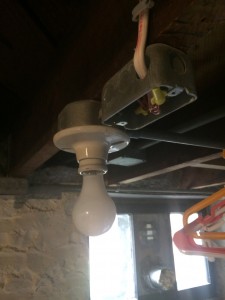
-Installed cover over electrical box.
On the ceiling, near the laundry room light, there was an exposed electrical light. I had duct-taped over it years ago, but the tape eventually peeled off. Below, you can see the exposed box, and how it appears now – safe and covered.
-Removed particle board shelving.
SPARE ROOM:
-Installed egress window.
Probably the most significant alteration to my house in these last 6 months was the installation of an egress window, which included loads of help from Owen (who helped me dig the trench), and my friend Jason, who knew what to do. Here are some photos from the project:
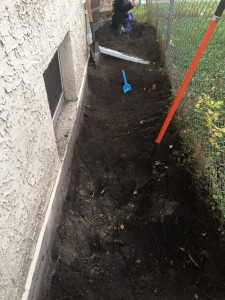
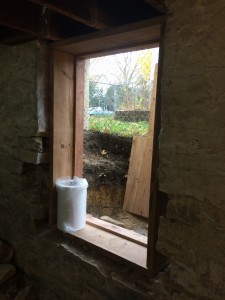
Here’s a view from outside the window – I had just begun work to dig a 4-ft trench for the window.
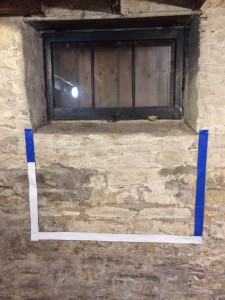 And here’s what it looked like indoors prior to beginning.
There’s a piece of plywood outside to minimize the cold coming in (it was a cooler November day when I did this). The tape on the wall indicates where I’ll need to jackhammer to create a large enough space for the new window.
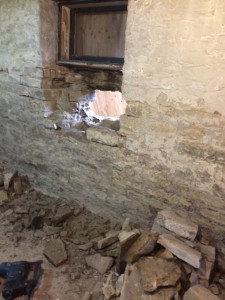 Here we are about an hour into the project. The old window is gone, and I have jackhammered a hole underneath.
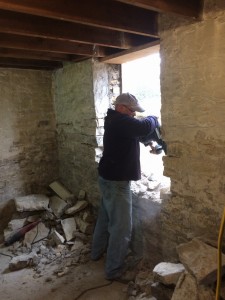 This is my buddy Jason doing some fine-tuning on cutting the hole to the proper size. Look at all that rubble!
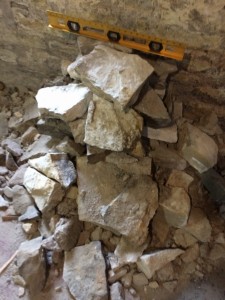 Here’s a better image of the rubble. Not sure why there’s a level on it. We probably just didn’t have anywhere else to set it.
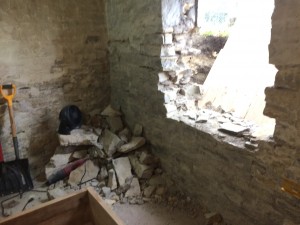 Holy basement, Batman!
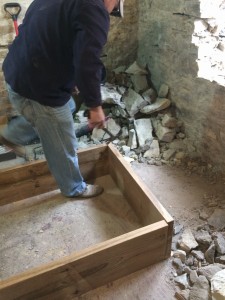
In the bottom left, you can see the frame we constructed for the new window.
 Jason is seen here completing the frame.
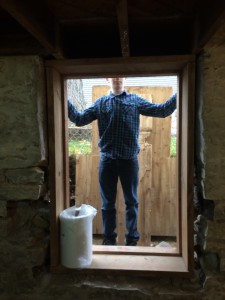 And now the frame is up! Owen is standing outside the hole to demonstrate its size.
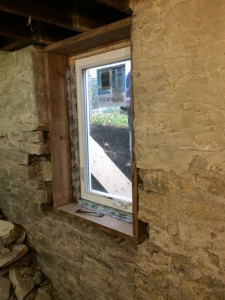
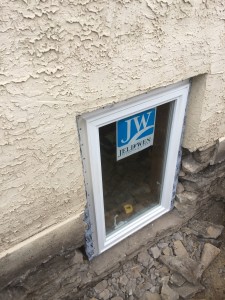 And here’s the window completely installed. Obviously, some work still needs to happen to finish the wall around the frame, and to properly landscape the outside, but this is how it sits right now. I’ll do more once it’s warmer.
-Removed sheetrock from walls
-Removed mortar from walls
Surprise! The previous owner used the wrong mortar to seal up the basement walls, so we are in the process of chiseling and jackhammering off the old mortar, which will be replaced with proper, breathable, lime mortar. It’s still a work-in-progress, but here are some images of the job so far:
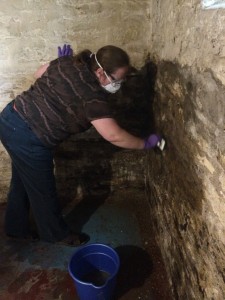
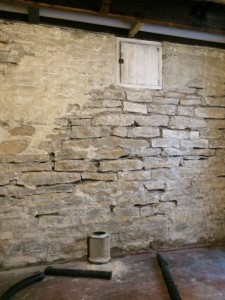 At left, Jennifer is bleaching off black mold, which we were positively delighted to discover underneath the sheetrock. At right, you can see the wall about 80% completed – that white stuff in the upper left has to go.
OUTSIDE:
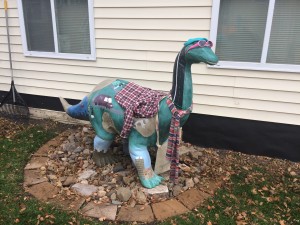
-Landscaped area around dinosaur.
Yeah, you read that right: I have a sauropod in my yard. And it’s awesome.
-Stained fence.
-Cut fence posts to match height of cross beam.

Here, you can see a half stained fence, and you can see that the posts extend higher than the cross beam.
Here, you can see Jennifer using a sawzall to cut one of the posts to make it flush with the crossbeams.
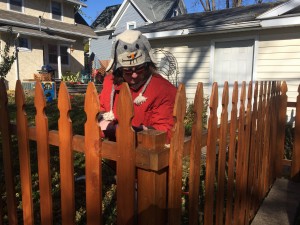
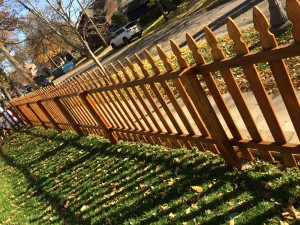
And here’s the fence completely stained, and with the posts cut flush with crossbeams.
GARAGE
-Installed tar paper on lower west side of outside wall.
There was just ugly sheet metal on it before. I removed all of that and installed tar paper, which is the first step in getting new siding on that portion of the garage. Which I intend to do this summer.
Good job James.
Thanks!